
Jennie's Blog Posts
Angel Custom Full Body Silicone
Here’s me and my friend Bonnie Sieben’s most recent work in progress.
Sculpted by her and cast into an soft squishy platinum silicone, she has custom armatures in her arms.
Painted and rooted by yours truly.
She’s adorable is she not? 🙂


Tutorial- Inserting glass eyes in silicone
So I am lucky enough to be an admin for a Facebook group called “Creating Silicone Babies“. Which is now approaching 1500 members! Come join us if you are interested in making your own, or drooling over new babies made. 🙂
So many members had questions on how to insert eyes into a blank silicone kit for painting and are afraid to do so.
I just finished a tutorial I made (39 pages!!) on the subject.
I hope it helps! 🙂
Click here for the tutorial:
pigmenting silicone
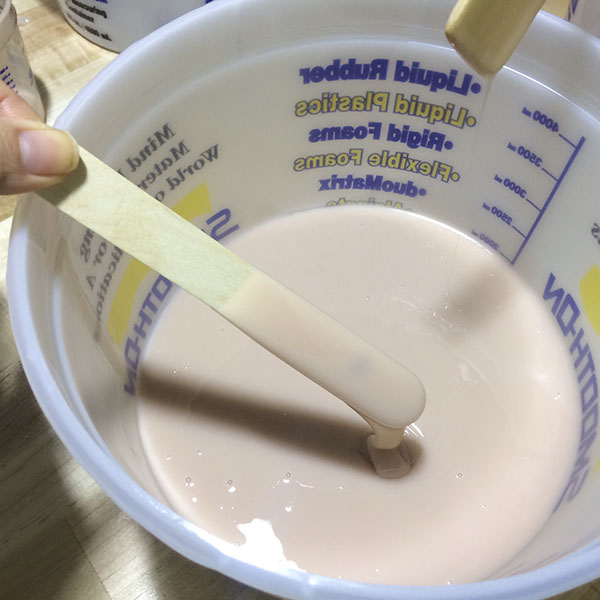
Had a few people with questions on how heavily they should pigment their silicone for best results. I use a combination of two Fusefx colors for my internal pigmentation, but thought Id share a quick trick to gauge opacity.
Draw a dot on a Popsicle stick with black or dark ink. After you pigment, dip the stick and read the dot area immediately. Should be similar in opacity to be good when cast. You can see the dot still- but it is significantly lighter. If you can see the dot well it’s not enough pigment.
When unsure- add extra pigment to be safe. It tends to look perfect in the bucket but lightens a tad when it cures.
I should also add the harder shore silicones take more pigment than softer ones.


“Angel” cloth body prototype silicone baby collaboration
Every so often I get reminded that women can be so extremely catty to one another. Why do we do this? I have no idea. Recently I was reminded that sometimes we women can only see each other as competition. In the doll world (which as you can imagine is full of women), it can be apparent that although we all are together for a love of something – we have difficulty just showing “love” for one another.
Today, I am happy to say, disproves this theory for me entirely. A collaboration among three women- an amazing sculpt by a woman I was so happy to “meet” online- Bonnie Sieben, A silicone doll kit cast by yours truly in a soft squishy platinum Eco 20 silicone, and finally brought to amazing lifelikeness by the amazing Kristie Carwithen of the Dainty Loft.
We three women, have been able to bring this baby girl to life and work happily with love and extreme admiration of each others work. This girl sold for a record breaking $11,101.99 for a cloth bodied silicone baby on eBay today.
I cannot believe how tremendously well she has done and I am so happy for all three of us. Not only is this a wonderful collaboration among three different artists- we have shown that it’s possible to be friends in this “dolly world.” This means to be honestly supportive of one another and see each other as contributors to this “art” that we all love.

monster clay armatures
So, I have been promising some tutorials. As I am working on some new sculpts and molding them I thought that I would share some tidbits.
Many have asked me how I hold my monster clay sculpts together. For those who aren’t familiar with monster clay- its a wax based clay made for sculpting. It’s formulation allows you to reuse the clay by melting it. It’s perfect if your piece is sculpted to be molded. I wouldn’t suggest using it unless you are molding the piece yourself. It’s softer than polymer clay when baked, and dents easily so shipment would be out of the question.
Most of my armature is just foil- except for the hands and feet.
Here’s a simple photo tutorial of how I make my reusable armatures. Monster clay is melted to reuse- and epoxy is fine for baking at low temperatures.
Items you’ll need:
Pliers
Wire in two gauges. I use copper
Wire cutters
Apoxie or similar two part epoxy clay
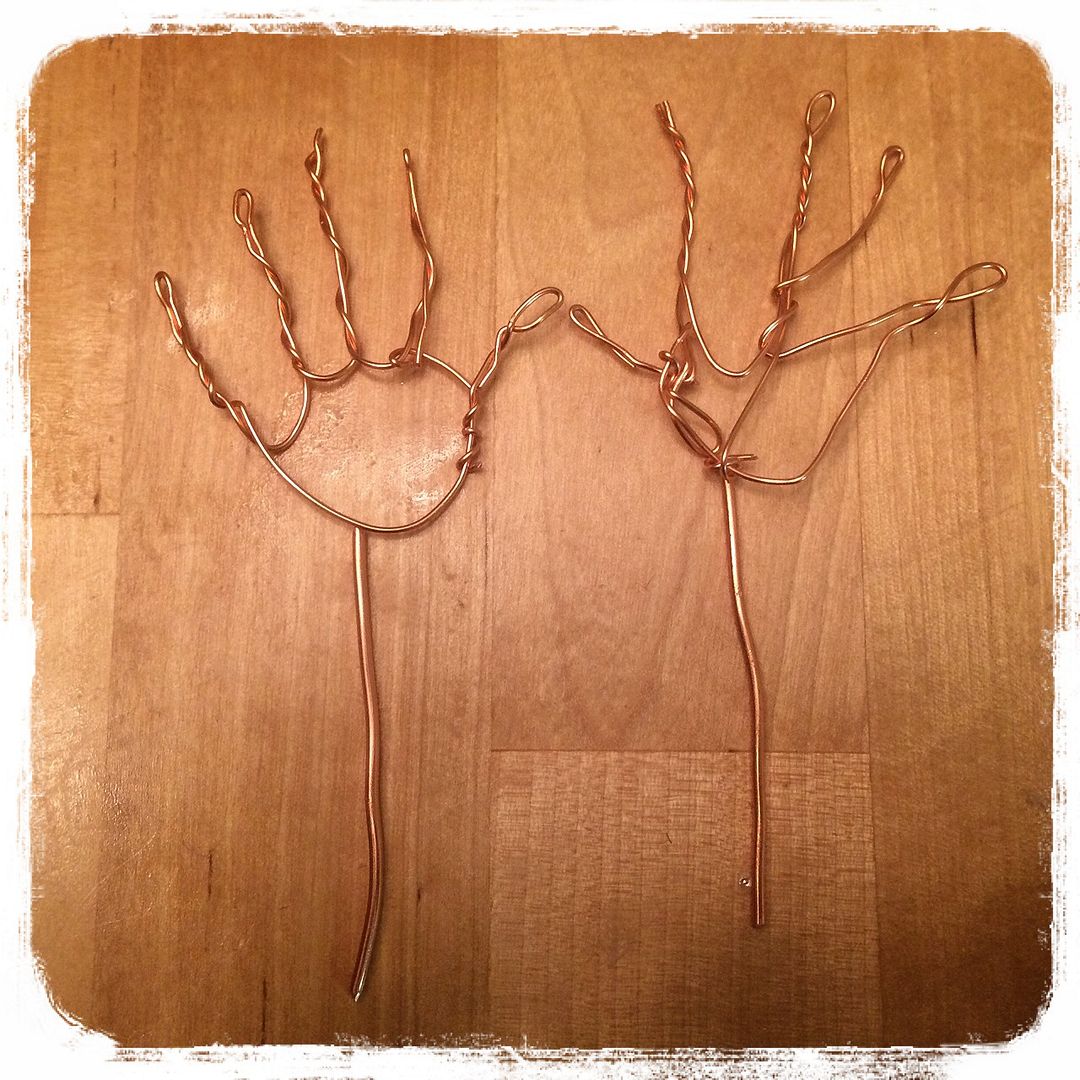
1) Twist wire to fit the size sculpt you want. My measurement was taken from my 3 month old niece.

Next, cut a thicker piece of wire to stick into the arm.
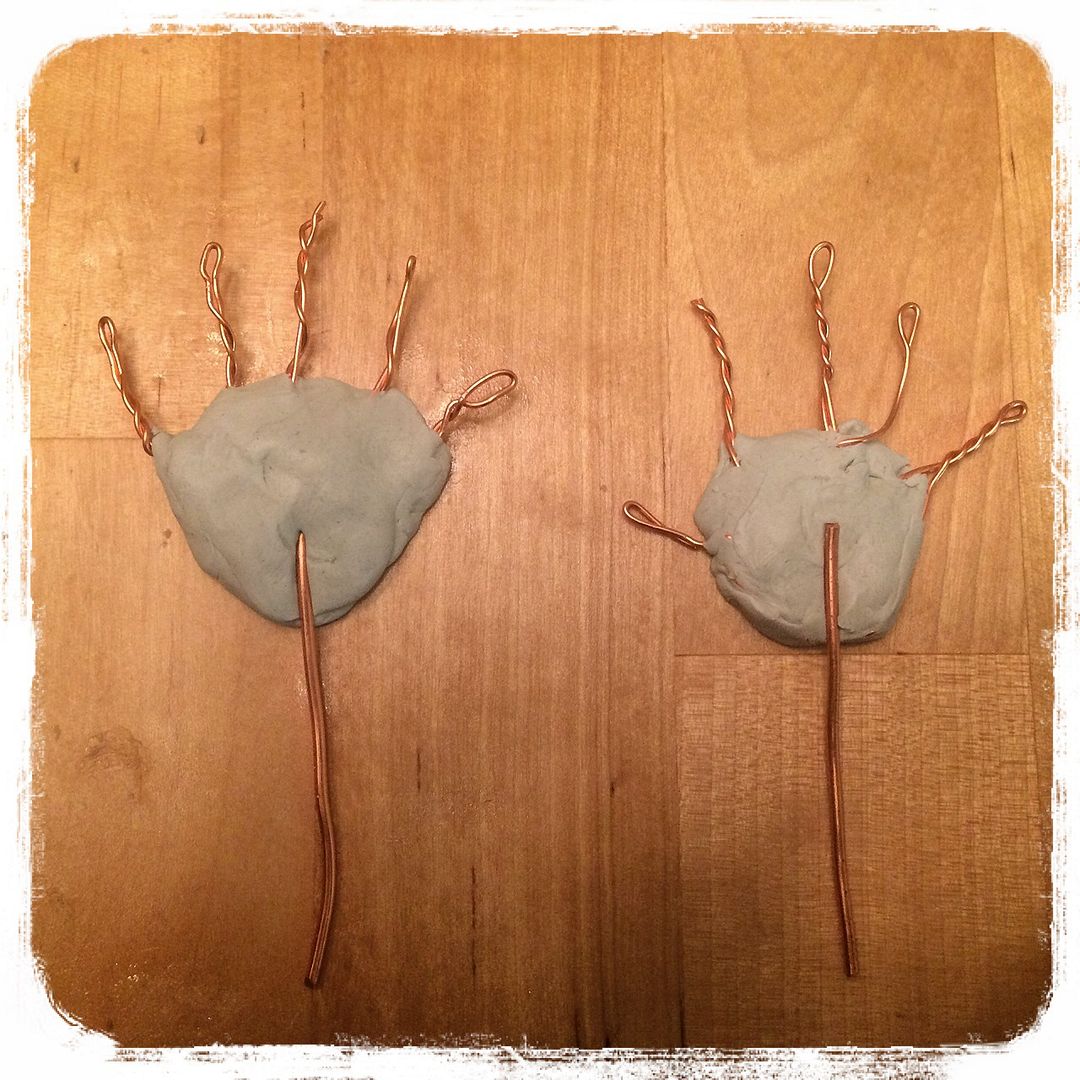
Mix equal amounts of two parts of your epoxy clay and attach to the hand area. This will also secure the two pieces of wire together for a sturdy armature.
Last, add rounded balls to the fingertips. This prevents the wire from sticking through the beds of the fingers.
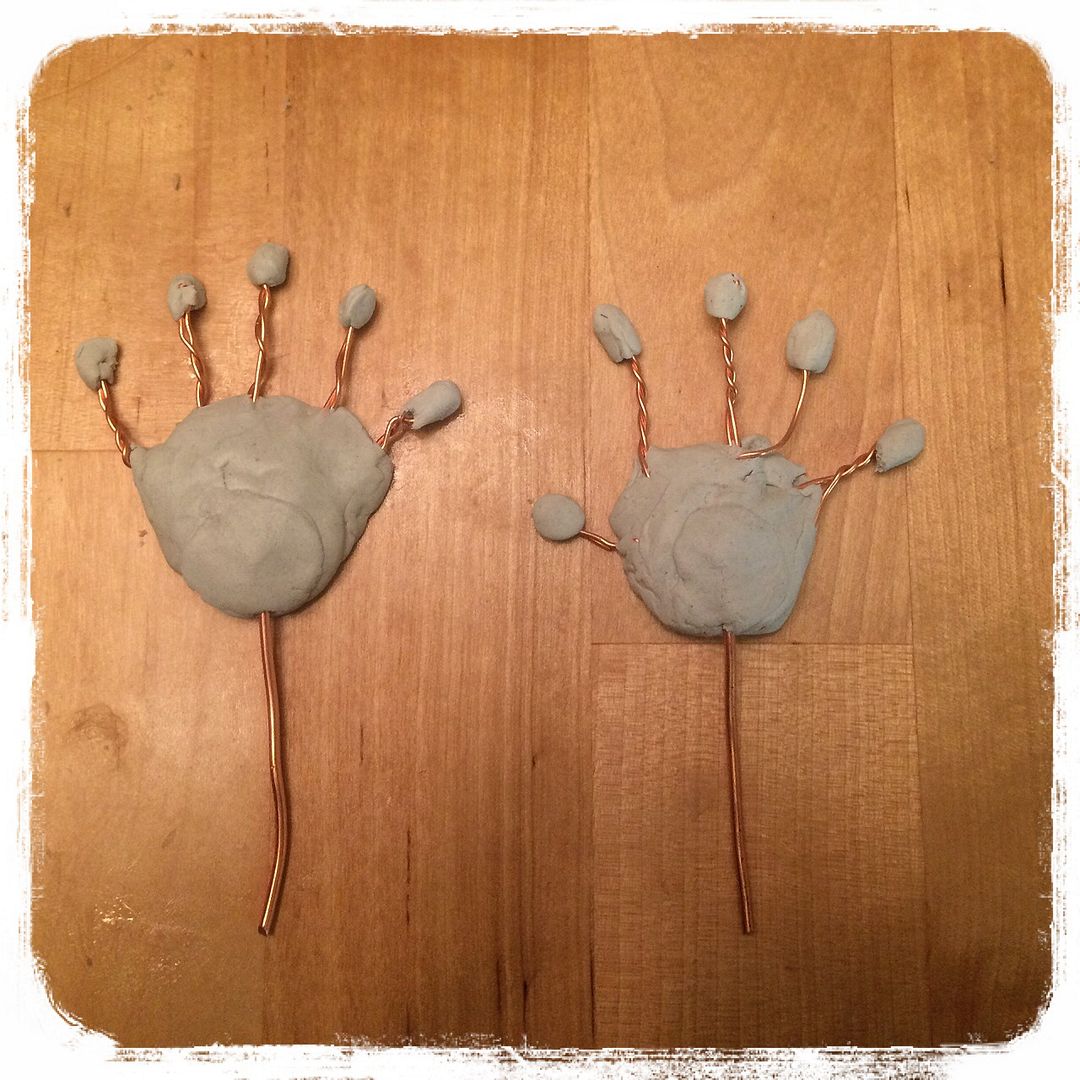
That’s it! You can smooth any rough areas with water, and let set overnight.
Now you have strong fingers and hands and won’t risk breakage when molding and painting your mold. The wire allows for bending and rebinding until you find a hand movement you like. 🙂


