
So, I have been promising some tutorials. As I am working on some new sculpts and molding them I thought that I would share some tidbits.
Many have asked me how I hold my monster clay sculpts together. For those who aren’t familiar with monster clay- its a wax based clay made for sculpting. It’s formulation allows you to reuse the clay by melting it. It’s perfect if your piece is sculpted to be molded. I wouldn’t suggest using it unless you are molding the piece yourself. It’s softer than polymer clay when baked, and dents easily so shipment would be out of the question.
Most of my armature is just foil- except for the hands and feet.
Here’s a simple photo tutorial of how I make my reusable armatures. Monster clay is melted to reuse- and epoxy is fine for baking at low temperatures.
Items you’ll need:
Pliers
Wire in two gauges. I use copper
Wire cutters
Apoxie or similar two part epoxy clay
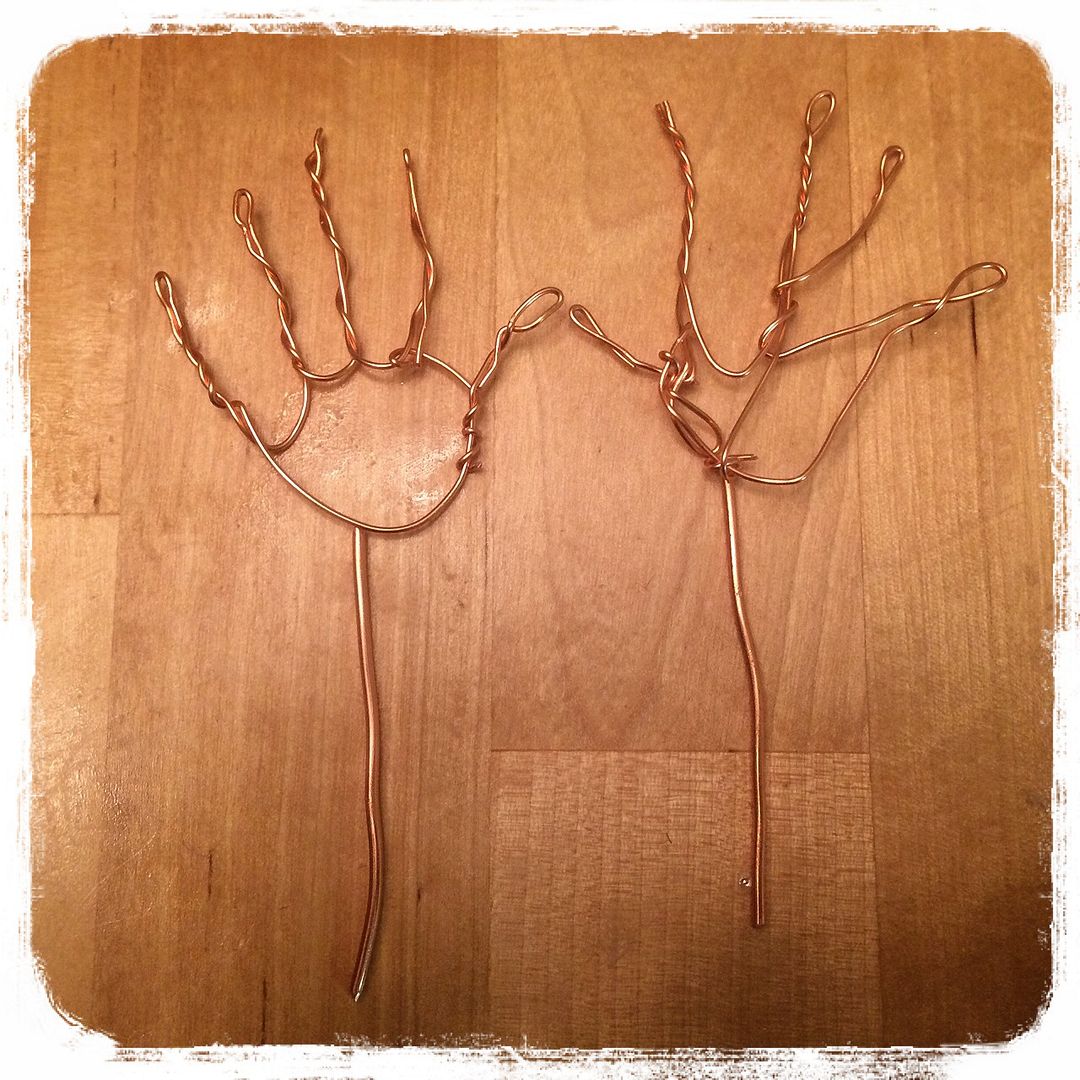
1) Twist wire to fit the size sculpt you want. My measurement was taken from my 3 month old niece.

Next, cut a thicker piece of wire to stick into the arm.
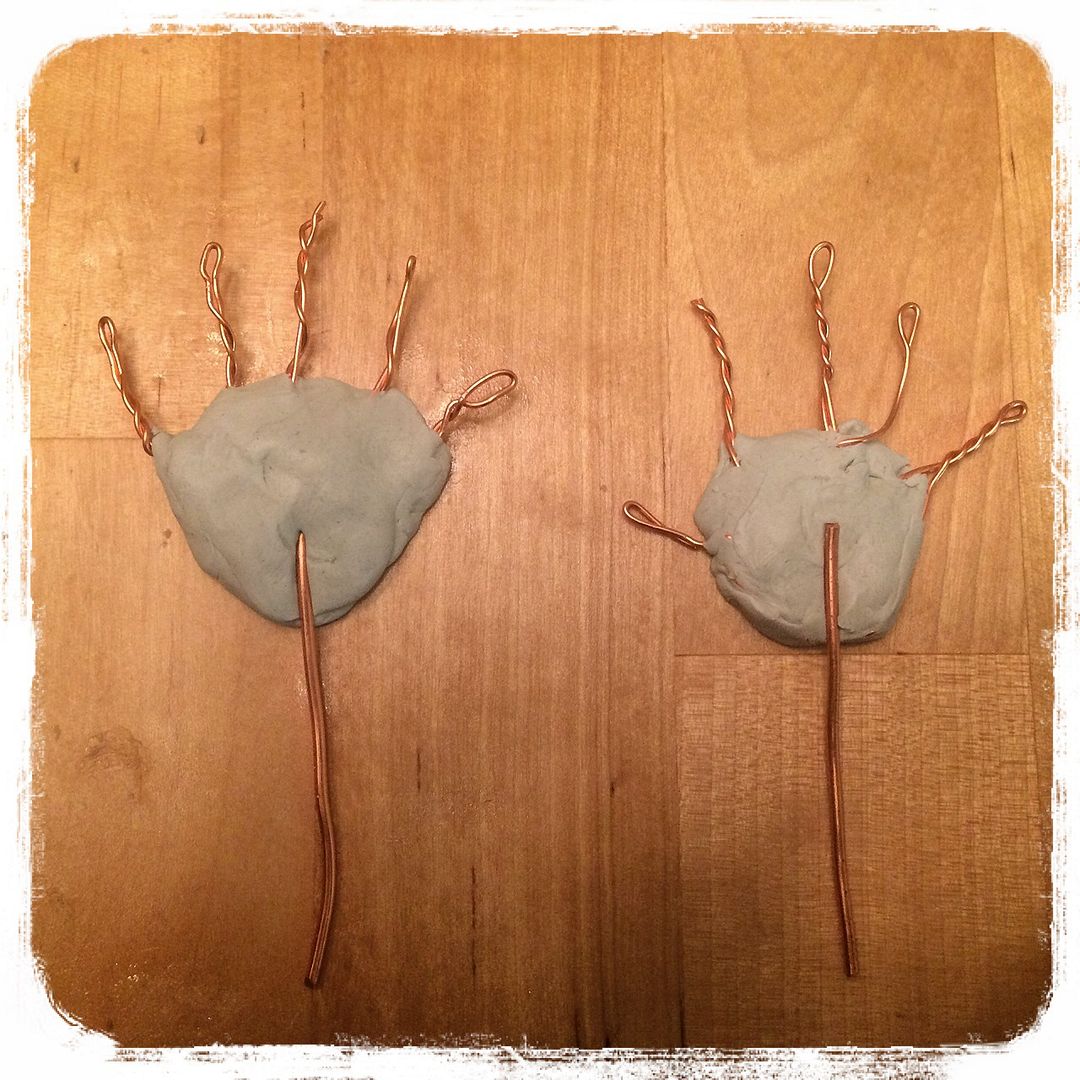
Mix equal amounts of two parts of your epoxy clay and attach to the hand area. This will also secure the two pieces of wire together for a sturdy armature.
Last, add rounded balls to the fingertips. This prevents the wire from sticking through the beds of the fingers.
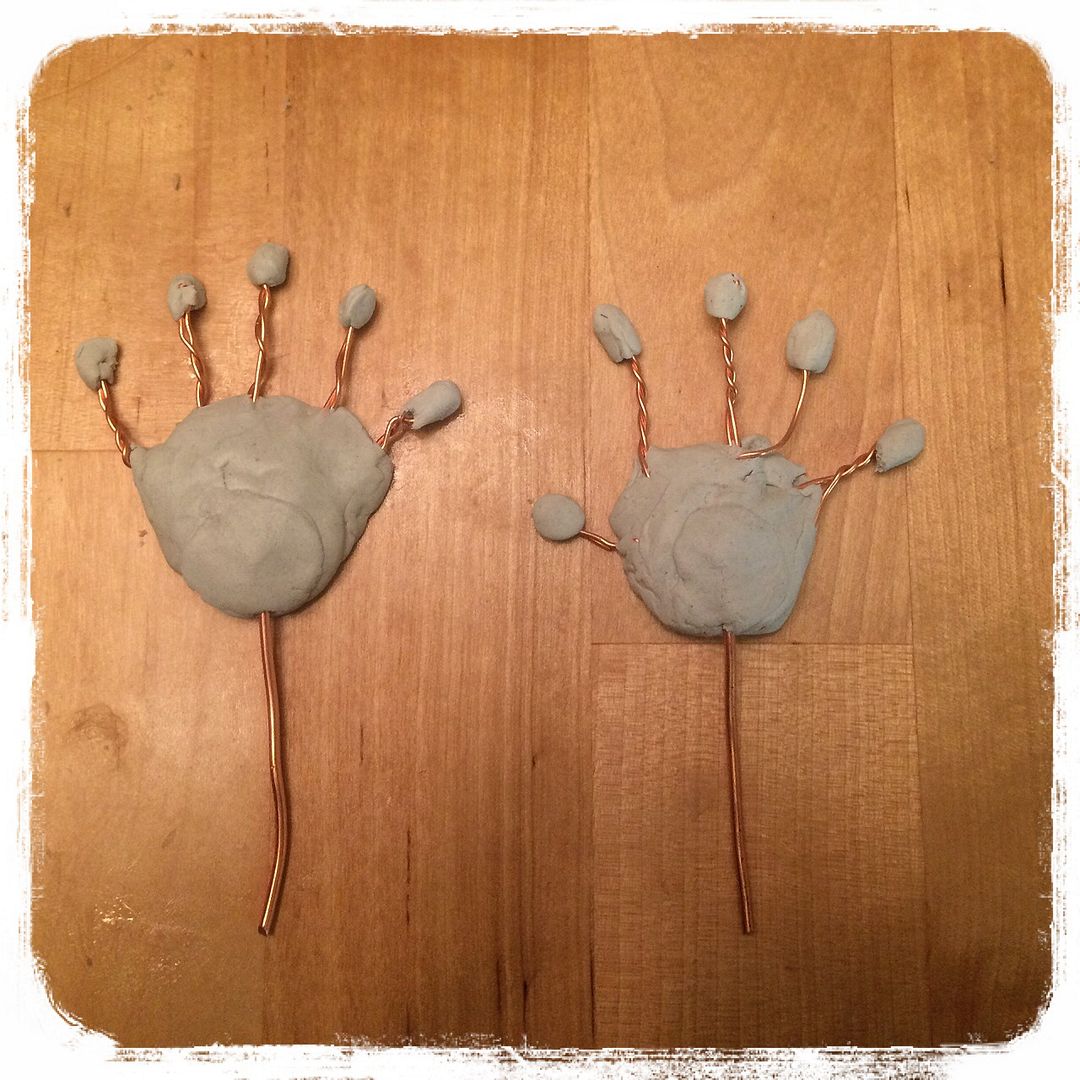
That’s it! You can smooth any rough areas with water, and let set overnight.
Now you have strong fingers and hands and won’t risk breakage when molding and painting your mold. The wire allows for bending and rebinding until you find a hand movement you like. 🙂


Thanks Jennie I have been reading and studying everything people put on Facebook, to try to teach myself. All material is appreciated.