
My clever use of blog post names cracks me up. 😛 I know, it’s silly and I am a bit lame, but otherwise all of my post headings would be “sculpting baby tutorials” or “doll rooting tutorials”. So bear with my lame blog entry names and enjoy the tutorials! 🙂
I have been posting quite a bit the past week or so, just because I have suddenly picked up some inspiration for sculpting again after quite the hiatus. Since I have been absent I have found quite a few new tutorials, and plan on posting some of my own on video format (free of course) to share with you all.
I was thinking I could do them based on requests- so if there are any specific aspects to baby doll sculpting you guys had questions about I can do them for you all to see. Just post a comment and I’ll do the best that I can!
Anyhow, today’s freebie was found when I was looking for rooting suggestions for dollmaking. Of course this can be used for your sculpted baby dolls as well as any other art dolls you may be sculpting.
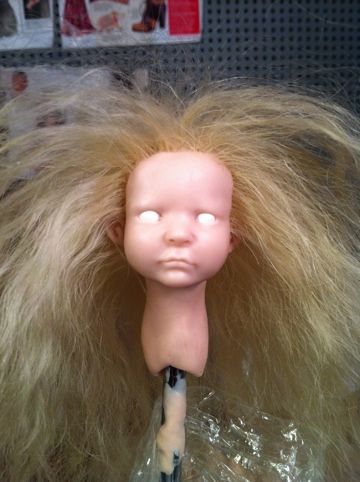
Pretty little fairy right?
The only thing that I would suggest when using this tutorial on a baby doll is that an infant’s hair is sparse, so try to root the hair farther apart than when doing a full head of hair. Place each hair that you are rooting a few hairs apart rather than right next to each other.
Also, when you are looking up rooting needles there are tons of different kinds. When you are rooting in clay it doesn’t really matter the size or type of rooting needle you use. The reason those matter is if you are rooting in a vinyl doll head (reborning).
Here’s the link!


